STEWED APPLES

Stewed apples are so versatile. You can have them for breakfast, as a snack during the day (in lunchboxes), and even for desert.  I love to have mine with custard, and at any time of the day or night.  Stewing apples are a good way to use the apples that are left at the end of the week before you put fresh ones in the fruit bowl from you shopping.


4 Apples

½ cup sultanas

1 tsp cinnamon

1 tsp mixed spice

1 – 2 MC of water


  1. Cut the apple into approximately 1cm cubes and place them into the TM bowl.
  2. Add the rest of the ingredients and cook 90 degrees / 20 min / speed 1.
  3. The amount of water that is added is dependent on how much juice you would like to have at the end and how juicy your apples are.  It really is to your own preferences.


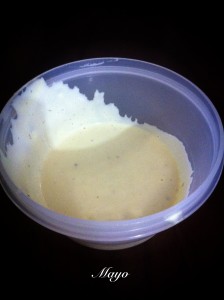
MAYO

I know this recipe is in the everyday cooking for every family but I have a friend that loves my mayo but she doesn’t own a Thermomix. So I thought I would put it up here so that she can make it in her food processor. The recipe in the Thermomix book sais to separate the egg and then add the white in after the oil and once the mayo is thick. I found this step not necessary, as using the whole egg in the beginning works just fine 🙂


1 – 2 Cloves Garlic

1tsp Mustard

1 Egg room temp

1 tsp Apple cider vinegar

Salt and pepper

250 g Grapeseed oil


  • Place the garlic into the TM bowl and chop for 5 sec / speed 9. Then scrape down the sides.
  • Insert the Butterfly, then place the egg, mustard, salt and pepper and vinegar into the TM bowl and mix 1 min / speed 4.
  • Now you need to set the TM to 4-6 min / speed 4. Turn the TM on and slowly add the oil to the lid of the TM bowl with MC on.

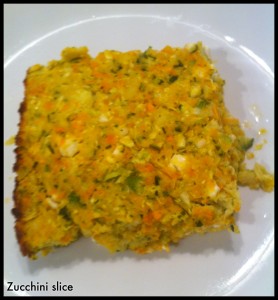
ZUCCHINI SLICE

While staying in my friend’s backyard in Maroochydore I have been taught this wonderful recipe and am keen to share it with you all.

2 zucchinis cut into chunks

1 carrot cut into chunks

1 onion quartered

1/2 cup GF self-raising flour

3 eggs lightly beaten

Feta cheese (I use Sheep)

Method:

  1. Place the carrot and then the zucchini into the TM bowl grate 2 sec / speed 9.
  2. Once grated remove from TM bowl and squeeze all the juice out. (this can be done with a nut milk bag or in a strainer)
  3.  Place onion in TM bowl and chop 1 sec / speed 9.
  4. Place all the veg into a bowl.  Add the rest of the ingredients and combine well.
  5. Put your mixture into a greased oven proof dish and cook for 40 min / 180 degrees or until cooked through and golden brown on the top.
  6. Allow to cool for around 15 min / ½ hour. Enjoy

Squeeze the juice from the zucchini and carrot is very important for if you don’t your slice will be to moist and end up as just hot slop 🙂

CUSTARD

This has to be one of the easiest recipes to cook and it is also one of my family’s favourites.  We whip it up after dinner for desert, as an afternoon snack, and even sometimes I whip it up for breakfast with stewed apple.

20g – 50g Honey

500g Coconut milk

2 Eggs

20g – 30g Cornflour GF


  1. Place all the ingredients into the TM bowl and mix 30 sec / speed 6.
  2. Cook  90 degrees / 7 min / speed 4.
  3. The amount of honey that you put in depends on the sweetness that you desire, and the amount of cornflour that you use depends on the thickness that you require.


Original recipe is from ‘Everyday cooking for every family’ Thermomix page 155

DONUT

Ahh donuts, they bring back so many fabulous memories of when my kids were babies and after having story time at our local library we would head over to the shops and have fresh hot cinnamon donuts as our treat for the week.  Even now as I walk past the fresh donut shops I think gee I would love one of them right now J.

1 cup (120g) Almonds

1 egg

2 tsp Honey

½  tsp Vanilla concentrate

¼ tsp Bi-Carb soda

¼ tsp Baking Powder GF

2 Tbs Cocoa Powder

½ Cup coconut milk


  1. Add the Almonds to the TM bowl 1 min / speed 8.  Scrape down the sides and repeat till you reach a nut butter consistency.  You may find doing it in 20 or 30 sec blocks works better for you.  Time will vary depending on the oil content of the nut.
  2. Once you have formed a nut butter you then need to add the rest of your ingredients to the TM bowl and mix 1 min / speed 4.
  3. Place you mixture into a pre oiled doughnut tray and back in the oven at 175 degrees for 15 min.
  4. Allow the donuts to cool for around 10 min in the tray then take them out and allow to fully cool on a cooling rack. Or you could eat them while still warm

Once your donuts are cool you can then ice them if you wish. I iced mine with coconut butter.

‘Original recipe from The Spunky Coconut’


NUT MILK

Ingredients


1 Cup nuts

4 Cups water


You can use whatever nut you like, I use blanched almonds because after I have made my milk I then have almond meal to use in my baking. This would apply to whatever nut you were to use.

Soak you nut for at least 1 hour, I tend to soak mine overnight. By soaking the nuts you are removing the enzyme inhibiters and making them more digestible.


Rinse the nuts well and place them in the Thermomix with the fresh water.

Blend for 30 sec / speed 8 or 9.  Allow the milk to settle for about 1 min and repeat the process.

Pore your milk into a jug through a nut milk bag or cheese cloth to catch the meal this way you won’t have chunky milk and you also have meal to use in your baking.

Don’t have a Thermomix but you do have a good quality food processor. Just apply the same principles.

COCONUT MILK / CREAM

Ingredients

100g organic shredded coconut

1200g water


# Place all the ingredients into the Thermomix bowl and cook on 100 deg / 8 min / speed 4

# Blend for 30 sec / speed 8.

# Pour your mixture through a nut milk bag placed into jug to catch the coconut.

# Squeeze out all the liquid from the nut milk bag. You may find using a pair of clean kitchen gloves handy as the coconut is hot.


Place you coconut milk in the fridge to cool. I leave mine overnight and then scrape the coconut cream of the top.


For those who don’t have a Thermomix I’ve been thinking of a way that you can make your own coconut milk. I haven’t tried it myself so any feedback would be great.

I was thinking you could put the same amount of ingredients into a wok with a lid or a sauce pan with a lid and heat on your stove till it comes to the boil. Then carefully pour the mixture into your blender and blend. Hope this helps you out.